Last spring, when I was putting together my anamorfake Pentacon 50mm lens, I had the overwhelming urge to get hold of a few more old M42 lenses of different focal lengths to hack in similar style. My project backlog has been a bit heavy since then, but while I was slightly stuck on the technicalities of the design for a couple of other projects I’m working on, I thought I’d clear my head with another nice simple lens hack.
This time the victim is the Pentacon Auto 135mm f2.8 (marked up on the lens as auto 2.8/135). There are a few different variants of this lens out in the wild. The original version had 15 aperture blades and a reputation for creating very nice bokeh, so I probably wouldn’t commit this act of vandalism on one of those. Mine is one of the more common six aperture blade versions and appears to be a non-multicoated example (no MC at the end of its name).
As far as condition is concerned, it was a bit ratty. The retractable lens hood was dented and loose, the glass needed some major cleaning throughout, the focus ring was pretty stiff and the aperture sticky. Sounded like the perfect starting point for a customisation job. This time, as well as an elliptical fixed aperture the lens also got a new body. But first I had to strip it down so all the glass could be cleaned and the helicoid de-gunked and re-greased.
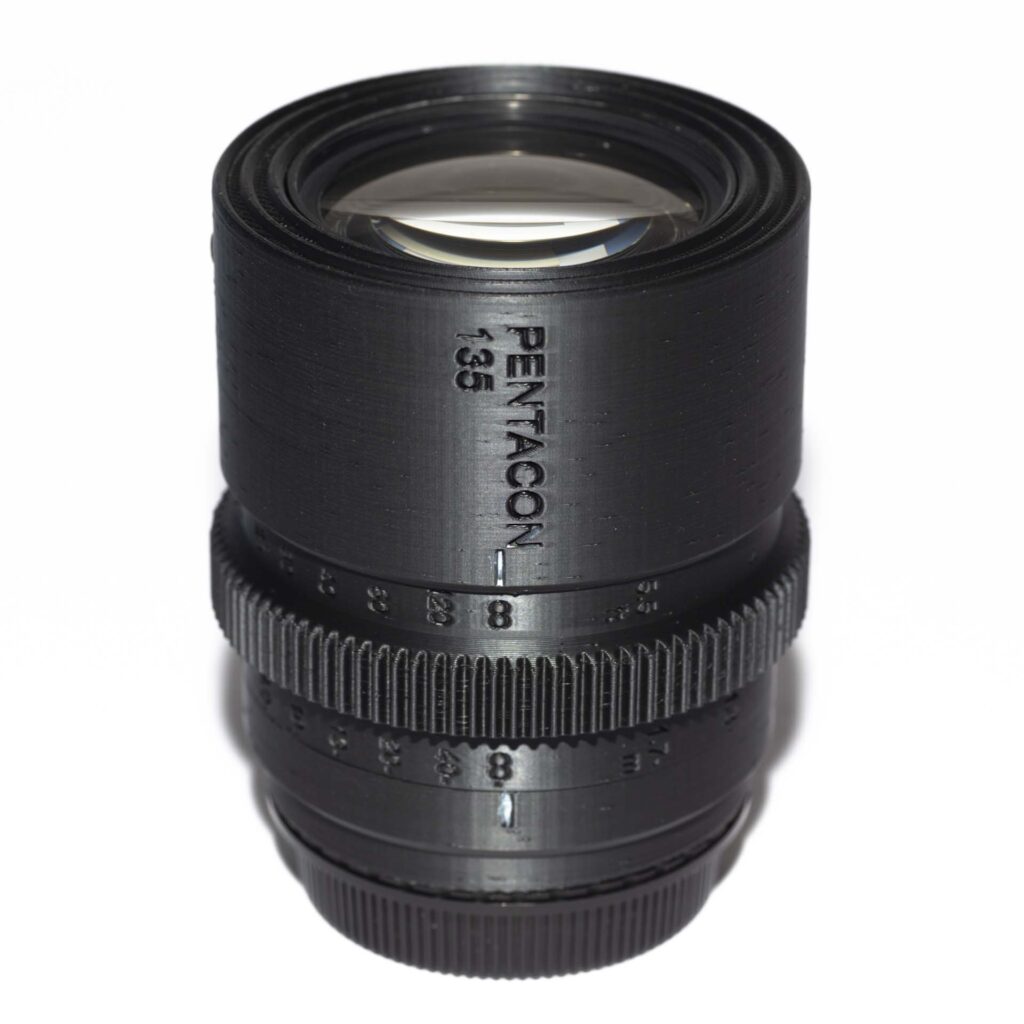
This was the starting point – the unmodified Pentacon 135mm f2.8:

Disassembly and Cleaning
The first step was to take the lens apart. The great thing with these old lenses is that disassembling them is normally not too complicated and this one is pretty easy. I’ve broken the steps down into groups to make it seem less daunting.
To access/remove the aperture mechanism:
- Extend the lens hood and remove the (extremely small) M1.5 grub screw where the tube with the front element meets the wider sections of the lens body (see below):

- Unscrew (anticlockwise) the front lens group assembly from the lens body.
- The lens hood can now be slid off the front lens assembly, and in my case binned.
- Looking into the lens body from the front, with a lens wrench unscrew the cylindrical sleeve that holds the aperture mechanism in place:
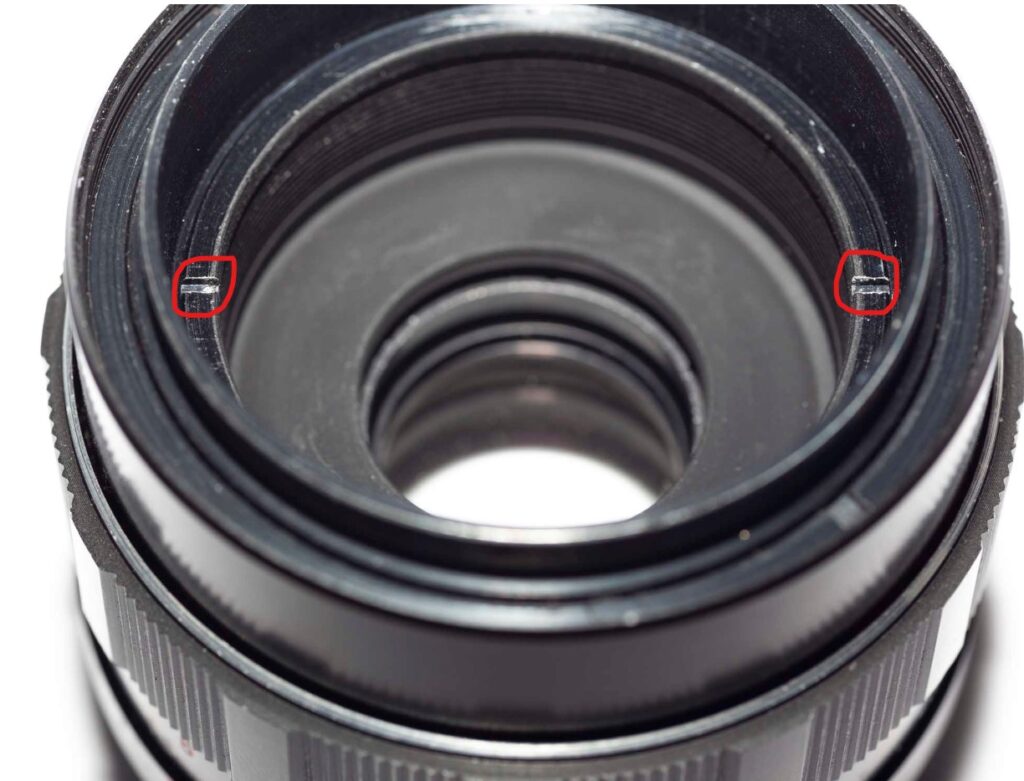
- Remove the aperture mechanism – happily I was never going to re-use this, as I suspect it would be very fiddly to reassemble the blades once they’ve been taken out:

To clean the front lens group:
- Using a lens wrench, unscrew the ring on the front of the front lens group and carefully remove the front lens element.

- Unscrew the back section of the front lens group with a lens wrench and remove the rear lens element – this one is a pair of lenses bonded into a sealed tube. I suspect it isn’t possible (or sensible) to try to open this up, but the inside faces appeared to be clean, so I just cleaned the outer ones.

- Clean and polish the lens elements, then reassemble the front group and put it somewhere dust free to ensure you don’t undo all that good cleaning work.
To remove the lens mount:
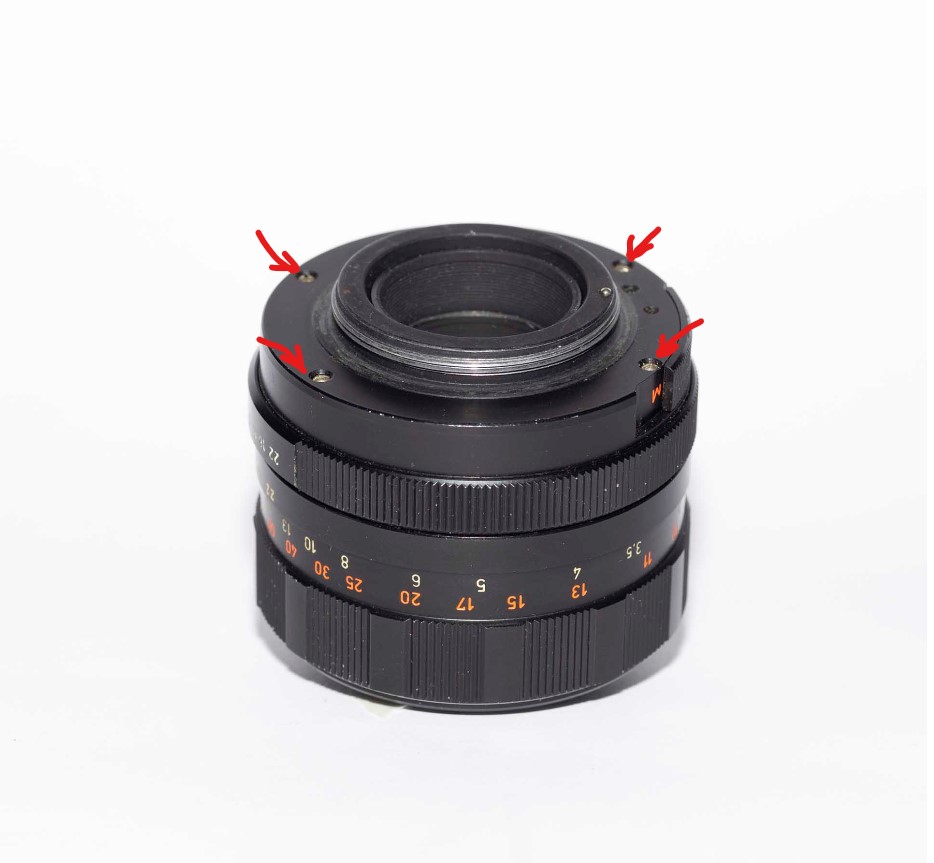
- Remove the four screws on the back of the lens (around the lens mount) – these are about a centimetre long, so should be a lot more difficult to lose than that grub screw in the first disaassembly step!
- Lift the lens mount off the back of the lens.
- Carefully lift the aperture ring off the lens body, making sure that the (quite small) ball bearing doesn’t drop out and get lost:
To clean the rear lens group:
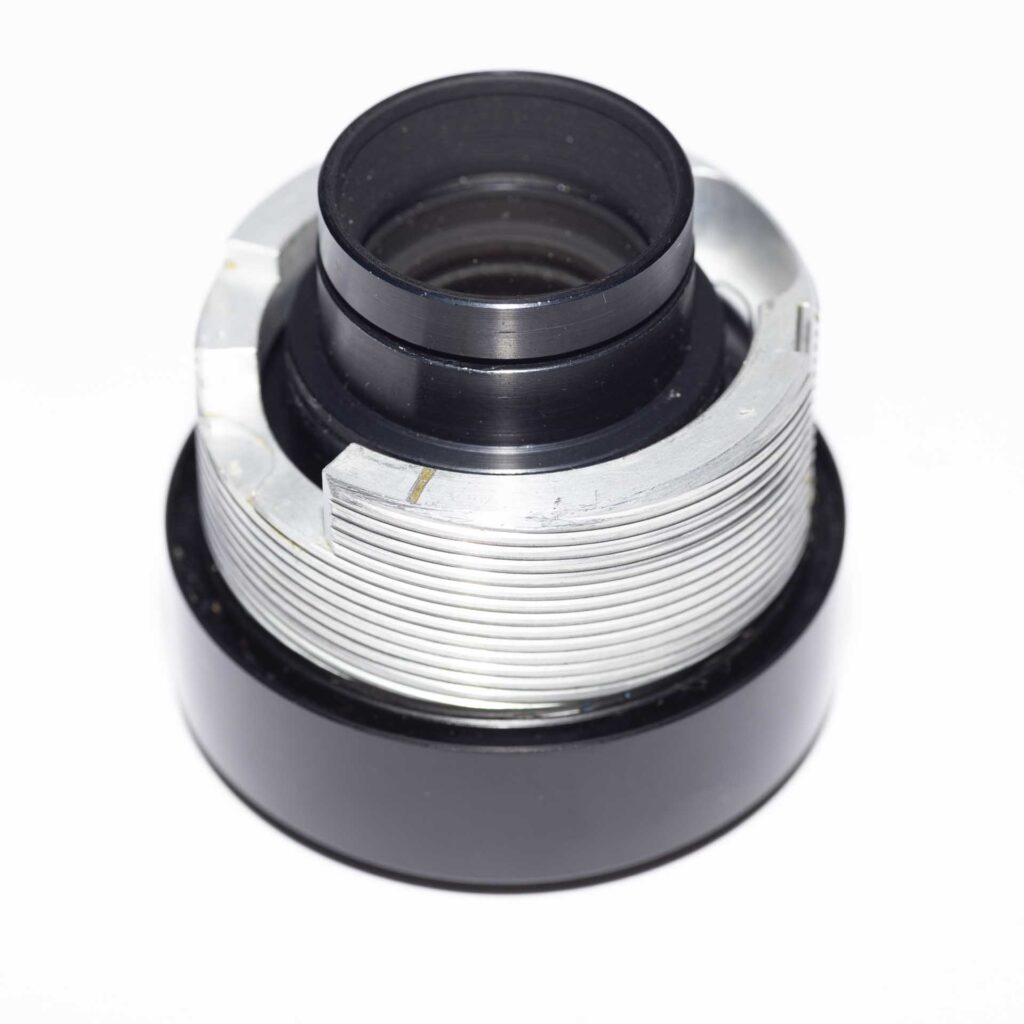
- Set the lens to infinity focus and unscrew the protruding band that holds the rear lens element in place (see photo above).
- With a soft cloth over the rear element turn the body over and the rear lens should fall out (onto the cloth). Note which way round it needs to be for reassembly.
- The front lens of the rear group looks to be a lot more difficult to remove, but this really isn’t necessary as both sides can be accessed for cleaning with it in place.
- Replace the (cleaned) rear element and screw the band back on to hold it in place.
Cleaning and re-greasing the helicoid:
This is not necessary if the lens is focusing smoothly, but mine wasn’t so had to be stripped, cleaned and reassembled.
- With the lens focused at infinity remove the two screws holding the guide piece in the slot, and take out the guide. (To help getting everything aligned during reassembly, mark the slot with a scratch at the top of the lens body.) Screws are circled below, but lens is not focused at infinity:

- Loosen the screw on the other side of the lens body – this stops the lens focusing past infinity:

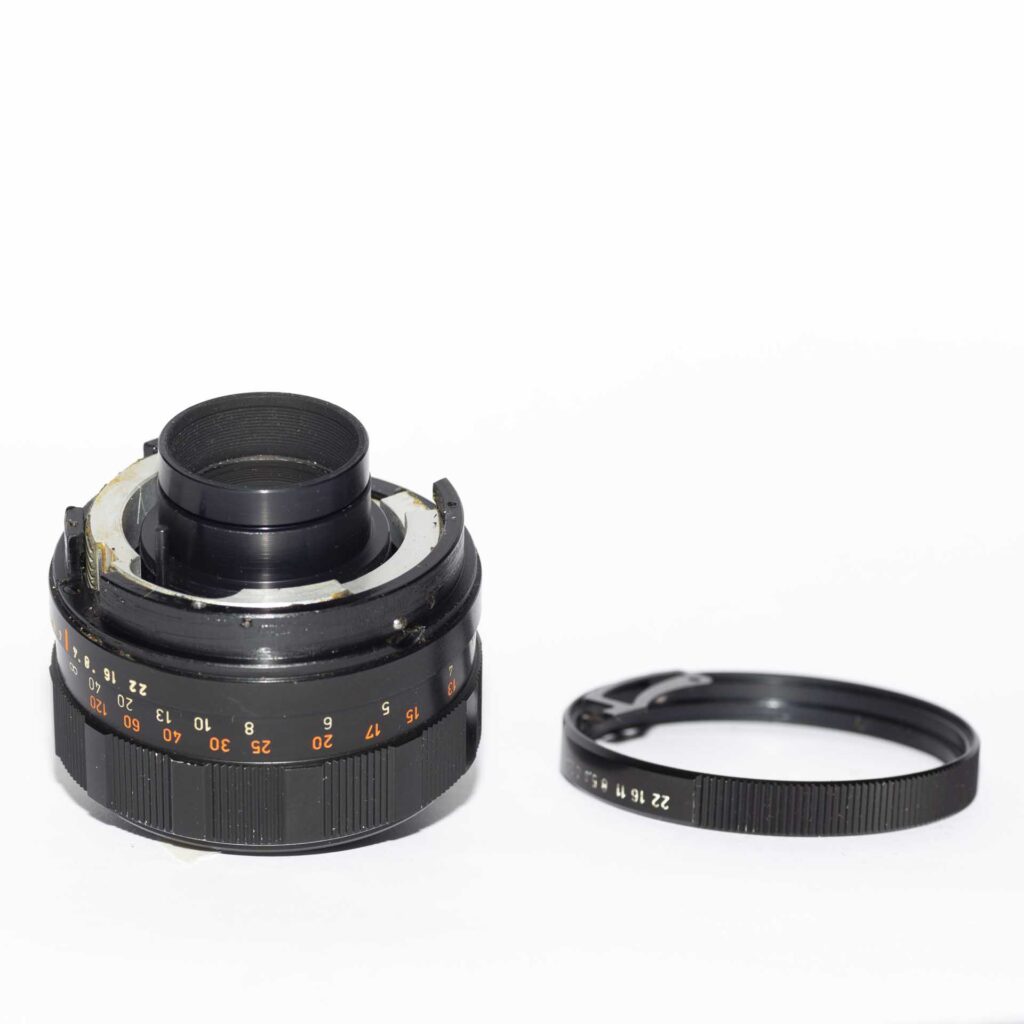
- Unscrew the ring with the focus mark from the back of the lens body.
- Turn the outer lens body until it runs down the helicoid and can be removed.

- Clean the grease off the helicoids on the outer and inner part of the lens body, and degrease the thread that attaches the ring with the focus mark. I used isopropyl alcohol and a toothbrush, which made pretty short work of getting the grease out of the threads.
- Apply a small amount of helicoid thread grease to the helicoid, and screw the outer helicoid up and down the inner a few times until it is running smoothly.
- Reverse the steps above to reassemble …
New Lens Body Design
When my lens was in various states of dissassembly I started working out the design for the new body. The lens doesn’t have a rotating front element, which is good news. Not quite such good news is the distance it extends between minimum and maximum focus – almost 14mm, which is quite a long stretch for designing the new lens housings.
One thing I decided very early on was that I didn’t fancy the idea of designing a new helicoid, so the old focus ring was going to have to stay. The other part of the original ‘external’ lens housing I kept was the ring with the aperture scale, because it has the four tapped holes that are used to attach the mount and replacing something this thin with a plastic part wasn’t likely to be strong enough. There are four parts to the new lens housing:
- Mount
- Spacer sleeve
- Main body housing
- Front housing
Since the housing has a follow focus gear, the focus scale was designed to be read from the side rather than the top of the lens.
Printing the New Parts
All parts were prototyped with eSun PLA+ filament. Final versions, apart from the spacer sleeve (which is hidden inside the housing), were printed with MatteForge matte black PLA with a layer height of 0.16mm. The front housing, main body and spacer sleeve printed without supports and with fairly standard settings.
The mount was printed with high infill for strength, and had to be printed with supports. For the final version I printed it M42 thread down, as this gives a better surface for the back of the lens assembly to fit against. It does, however, need a lot of work removing the residual support pattern from the bottom to allow the M42/Canon adapter to screw on far enough for the focus mark to align properly.
The aperture disk was printed with a 0.12mm layer height. It did print with a few small gaps and pinholes, as the thinner part is only 4 layers thick. These were filled with a coat of Mr Surfacer 500 (paint-on model filler), followed by a coat of matt black paint. The aperture disk is designed to fit with the flat surface towards the camera mount.
Penacon 135mm Rebody
Finally, putting it all back together. The printed mount replaces the original M42 lens mount and aperture ring – this screws onto the back of the lens using the four screws that held on the original. The new mount has an M42 thread cut on it which is used to attach a M42/Canon EF adapter – I used one with a focus confirm chip.
The spacer sleeve is just a simple tube that fits over the back section of the front lens group assembly. It has a hole towards the back to access the grub screw that attaches the front lens group to the lens body (see disassembly step 1).
The main body housing fits over the original focusing ring and aperture scale. It has a follow focus gear rather than a conventional focus ring, and also has focus scales in feet and metres embossed round the barrel. It has a 2.5 mm hole between the 9 and 10 ft markers – this was hand tapped with an M3 tap to fit a 3mm long M3 grub screw which drives into the ridges on the focus ring to stop it slipping.
The front housing fits on last, sliding over the front group, spacer sleeve and main body housing. It’s easy to align since the front lens elements don’t rotate, and it has a M2.5 10mm screw at the bottom to hold it in place against the front lens barrel.
The finished article looks like this:
The stl files for the new lens housing and aperture disk can be found here.
Finally
Because lockdown restrictions are still in place here, I haven’t yet had the chance to take the lens out for a spin. Design and prototyping was quite a time consuming process, so after all that work let’s hope the lens produces some decent results. Watch this space for an update …
2 thoughts on “Pentacon 135mm Rebody: A Sheep in Wolf’s Clothing”