Moving on from my first prints, which used the pre-prepared gcode files supplied on the Ender 5 Pro’s micro-SD card, the next move for me was to download and print a few upgrade parts for my printer from Thingiverse. These parts generally come as .stl files, so they need a small amount of work to turn them into something that can be passed to the printer and converted into plastic.
This is where a slicer program fits into the 3D printing workflow: load a 3D model from a CAD system, slice it to produce a gcode file, transfer the gcode file to the printer and print it. As the name suggests, the slicer slices up your model to make the layers that a 3D printer actually prints.
I started out using Creality Slicer as this could be installed straight from the micro-SD card supplied with my printer. This is where I hit the first snag! Once it was installed on my Windows 10 machine I only seemed to be able to run it as administrator. This was far from ideal.
When it was running, switching to advanced settings did allow customisation of quite a lot of parameters, so that was a positive. But ultimately having to run as administrator was a big negative. I tried a re-install but the problem persisted, so I decided it was time to move on.
Cura
In the course of my online research/learning about 3D printing I had run across a lot of very positive write-ups about Ultimaker’s slicer, Cura, so I thought I’d give that a try. It can be downloaded for free from the Ultimaker site. Cura has profiles for a massive range of printers, including the Ender 5. With the printer selected, the standard set of “Recommended” parameter settings for a print looks like this:
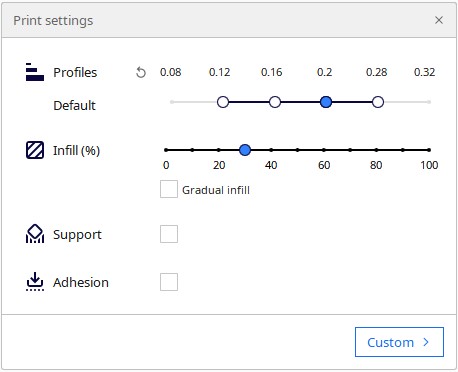
Very simple and great for a beginner, but I soon needed to get access to a few other settings, specifically nozzle and build surface temperatures. To do this you have to switch to the “Custom” settings (using the big button bottom-right). This is what then appears:

Now that doesn’t look too complicated until you start clicking those left arrows beside the list of headings. This opens up a truly vast set of options. Below is the result of opening up the “Material” section:

Almost certainly a lot more settings to fiddle with than I’ll ever need. However, leaving most of them as I found them I did manage to adjust nozzle and build plate temperatures to what I actually wanted. I sometimes use a higher build plate initial layer temperature for better print adhesion – again this is very easy to set (see above).
The Model
So that’s a quick look at print settings, but what about the actual model? Loading up a .stl file the model appears on the build plate, almost certainly not orientated the way you want it. Note that the build plate’s origin point is marked by the three coloured axes. On the Ender 5 the origin is at the back right corner – I believe that for most other printer’s it’s the front left corner, or at the build plate centre for delta printers.

Changing the view and messing about with the model on the build plate is once again very easy. It can be moved, rotated and scaled using the buttons on the left. When you’ve got it where you want it, hitting the “Slice” button at the bottom right of the screen does exactly what you’d expect. When the object is sliced Cura tells you how long it’s going to take to print and how much filament it’s going to use. All very helpful!
After slicing, using the “Preview” button at the top (next to “Prepare”) you can see what the printer’s going to actually produce. You can slide down the layers to get a layer by layer view of what’s getting put on the build plate (including supports if they’ve been specified), and you can even replay individual layers being printed.
A Few References
While I found Cura very simple to use for the basics it’s massively powerful and once you get under the hood there are an overwhelming number of settings that can be adjusted. Luckily there are a lot of good learning resources available both in written form and as videos on YouTube. A couple the I used to raise myself (a little way) from total cluelessness were:
This one on All3DP for the basics.
CHEP on YouTube: he’s created a whole series covering new features of the different versions of Cura.
There are loads of others out there, and my learning has a long way to go, so I suspect I’ll need to look at a lot more as I start to design and print more complex models.
One thought on “Slicing: Another New Skill to Learn”