Printing one of the last parts for my motorized macro rail last week I noticed that the print quality had suddenly taken a major step in the wrong direction. The part this really showed up on was the top of the camera platform, which came out looking like this:
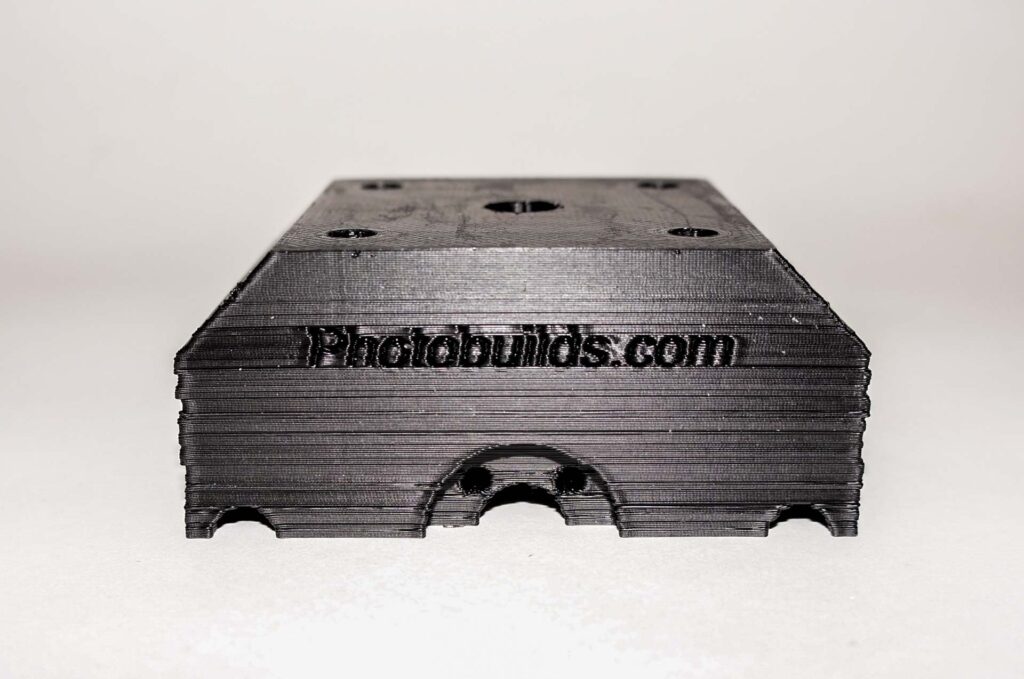
Now that’s a fairly ugly looking print! The problem appeared to be small(ish) and fairly random layer shifts as the print progressed. These were occurring in both the x- and y-directions. Taking a closer look at some other recent prints it appeared that there had been a problem for a while. It started out barely noticable, but its seriousness got steadily worse. Apart from looking dreadful, the shifts mean that the macro rail’s shaft bushes didn’t fit in their slots and the holes for attaching the lead nut screw were distorted. So basically the parts I’d been making were unusable and production ws shut down until I could get the problem fixed!
Rollers, Pulleys and Belts
Before getting too deep into the guts of the printer I made sure the v-rollers and their guides hadn’t got any debris stuck in them. In fact I gave them a good clean, as it’s been a while since that was done. I also checked the extruder for debris and re-levelled the bed to ensure that wasn’t part of the problem.
The next area I investigated was the tightness of the printer’s pulleys. If these aren’t tight on the motor shafts they slip, which can be a cause of layer shifts. All were tight, so that was one potential cause crossed off the list.
Next the printer’s drive belts were checked for tension. The arrangement of belts and method for tensioning them varies greatly from printer to printer, so the detail here is very Ender 5-specific. The y-axis belts (there are two on the Ender 5) looked OK but the x-axis belt was a bit slack. For the Ender 5 Pro tightening the belts is a very simple process, as demonstrated in this Creality Service video. After tightening the x-belt I ran a test print using a speed tower created using Cura’s “Auto Towers” plugin. This printed perfectly, which looked like a good sign.
As an aside, examining the tower the best print quality was at either 40- or 60mm/s. I re-sliced the bottom section of the macro rail platform using a print speed of 50mm/s and reprinted it. The result was a lot better, with virtually all the layer shifting on the x-axis gone and very little on the y-axis. Not bad, but not yet quite where I wanted it to be.
Stepper Driver Cooling
Something I noticed looking at my recent sub-standard prints was that the layer misalignment started part-way up the print. This could suggest that the problem was caused by something in the printer overheating. The most obvious area this might be happening was the control board and particularly its stepper drivers. The controller is located in the base of the printer next to the power supply. The board is cooled by a fan on the bottom of the enclosure. It seemed like a good idea to test this in case it had packed in.
With the Ender 5, to get at the fan it was easiest to tip the printer onto its left side, making sure it wasn’t resting on any of the protruding bits. The bottom plate was then removed by taking out four small bolts. With the plate off, the fan was unplugged from the control board and tested – and found to be working perfectly. Another possible culprit ticked off the list.
Hot End – What a Mess
Retractions, or the lack of them, can be a cause of layer shifts, so next I took a look at the nozzle to see what state it was in. It looked pretty mucky, so I took the print head fan housing off and removed the silicone boot around the heat block. This showed up a very tangible problem:
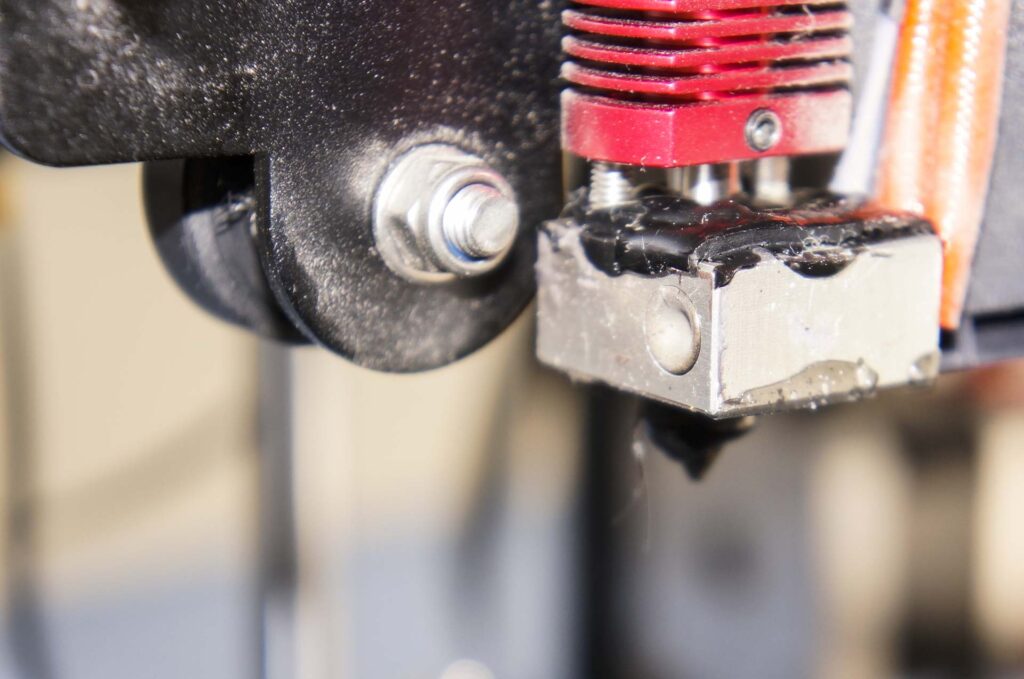
The heat block really shouldn’t look like that! The top and bottom were covered by a layer of plastic, and the sides had a fair amount too. And that plug of plastic around the nozzle didn’t look too clever either. Getting it back into working condition didn’t exactly look like it was going to be five minutes’ work. To get started I heated the print head to working temperature and removed as much melted filament gunk as I could – which was quite a lot.
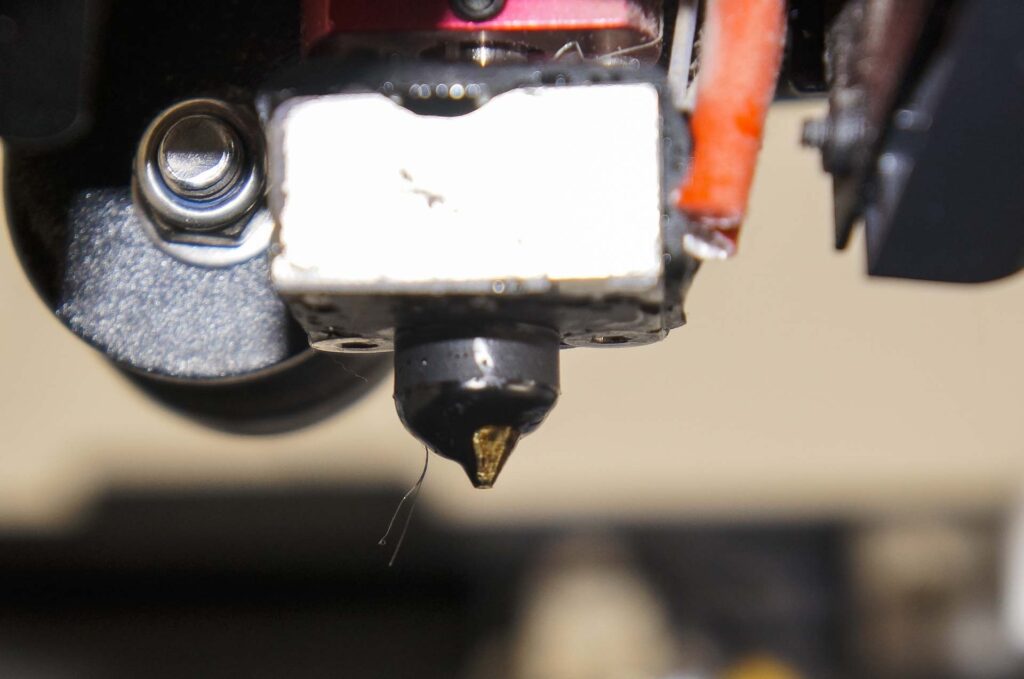
Nozzle
One thing I noticed at this point was that the nozzle wasn’t tight. This was presumably the source of the problem. My guess is that the extruder was forcing molten plastic out out through the loose screw threads and, mostly contained by the silicon boot, it was then liberally spreading itself over the surfaces of the heat block. The plug round the nozzle was basically where plastic was being forced through the hole in the boot.
After collecting as much gunk as I could with the head in-situ, I removed the Bowden tube and nozzle, then removed the whole hot end from the printer to make it easier to work on. The end of the Bowden tube was looking a bit knackered. It had been re-seated (and therfore shortened) a few times, so couldn’t afford to have much more cut off. To ensure the tube would be long enough to reach the front-left corner of the build plate when the head was reassembled I ordered a replacement length of Capricorn tube (with associated Creality parts). I did consider replacing the whole hot end, but decided have a go at cleaning up the original first.
Cleanup and Reassembly
Tools for the cleanup were a small flat bladed screwdriver, a pair of sharp nosed pliers and vise grips (for holding the hot block). At regular printing temperature (210°C) the plastic on the block is molten, but cooling the head to about 150°C made it easier to remove in lumps. It didn’t take me too long to get the heat block into a reasonable-but-definitely-second-hand condition.
At this point the hot end was was reattached to the printer, then the new Bowden tube, nozzle and silicone boot were installed. I relevelled the bed, and the printer was ready for a test print. I considered printing another speed tower for a test as it’s fairly quick. However, the previous speed tower printed OK when the printer was playing up, so it can’t be the most exacting of tests. Instead I went for another macro rail platform bottom to add to my collection. Three and a half long hours later …
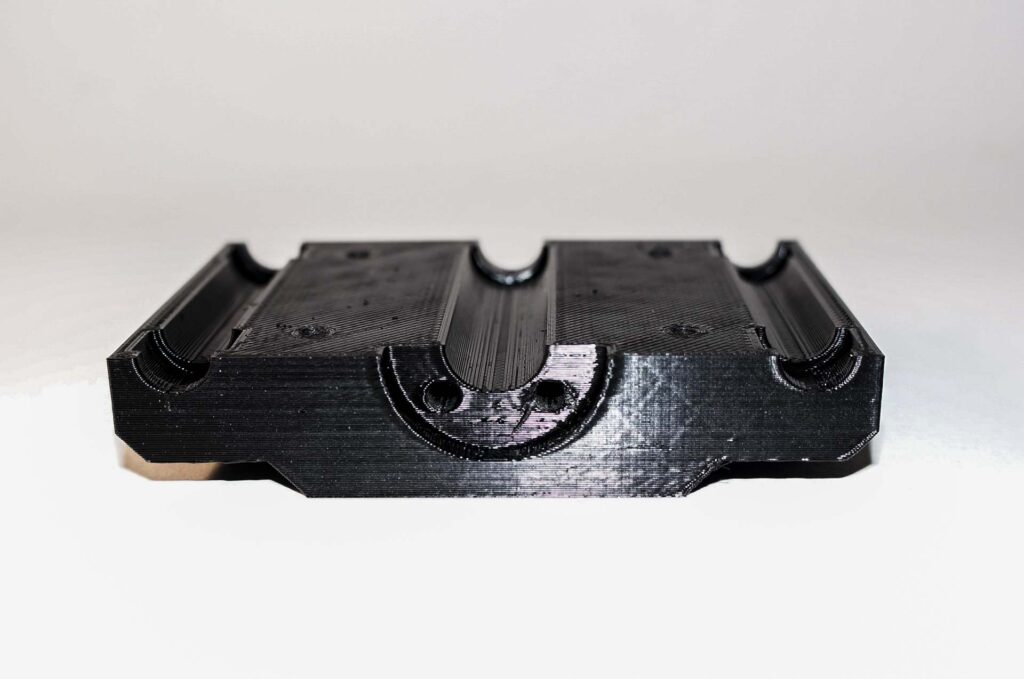
Well that was a relief – the best looking print I’d produced for about ten days. Feeling more positive, I finally managed to print the last part of the macro rail, the platform top:
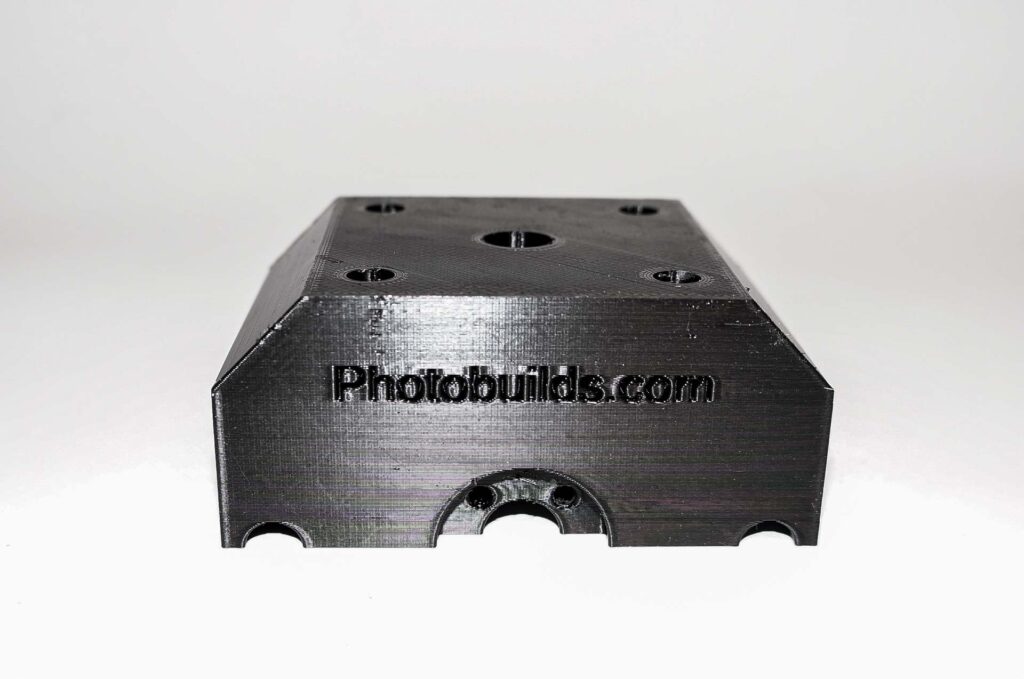
For contrast here is a before and after shot with the two platform tops side by side for comparison:
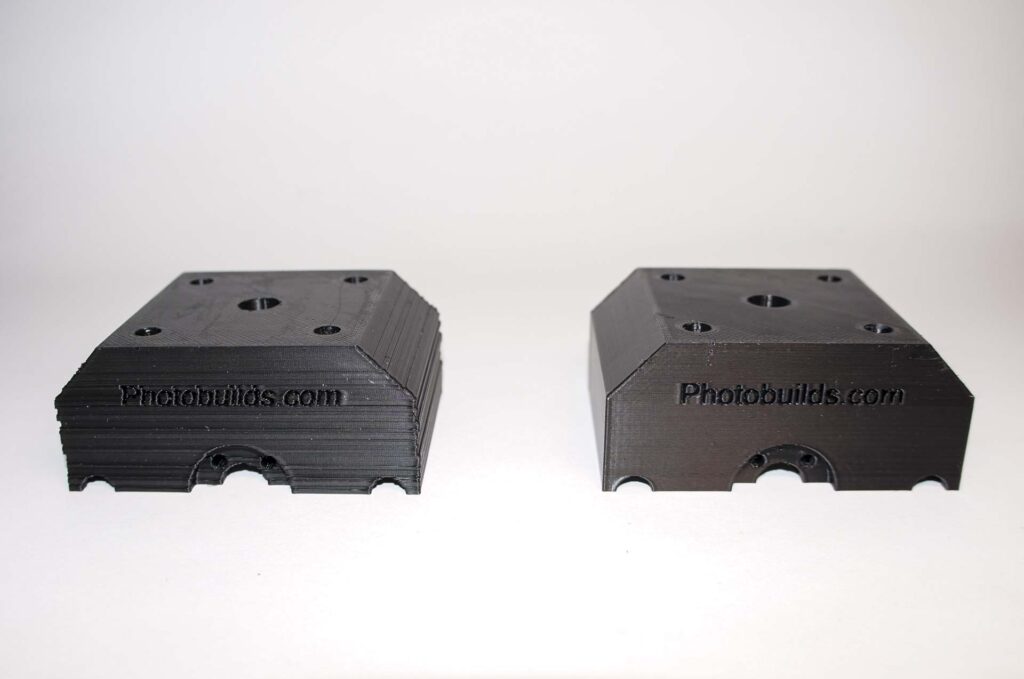
Apologies for the quality of the lighting in these shots – I was having to use on-camera flash. Never ideal for a slightly shiny subject.
I’ve had my Ender 5 Pro for about two and a half years now and it has given me virtually no problems. However, this episode has demonstrated just how reliant I now am on it for the projects I’m building. And also how everything grinds to a halt when the printer isn’t working. Maybe it’s time to get a second printer as backup.
One thought on “When it all goes wrong – 3D Print Layer Shifts”