In my last post I covered getting OctoPi/OctoPrint installed and configured on a Raspberry Pi to provide remote control and monitoring of my 3D printer. The next step is to add a webcam to OctoPrint to give a live view of print progress. The additional bonus is that it allows me to make timelapses of my prints.
Getting the webcam installed involves making a couple of minor edits in one of the files on the OctoPi’s micro-SD card, but nothing too scary! Equipment-wise the only additional part that’s needed is a webcam: OctoPrint supports a load of them as detailed on this page on the OctoPrint site. My webcam is just a generic 1920×1080 model bought from Amazon a while back, but it worked first time based on my best guess of which settings to use.
File Edits
To get the webcam set up, the edits need to be made in the file named “octopi.txt” in the root directory of the OctoPi SD card. To do this I powered down the RPi, removed the SD card and plugged it into my computer. The file was opened and edited in Notepad++.
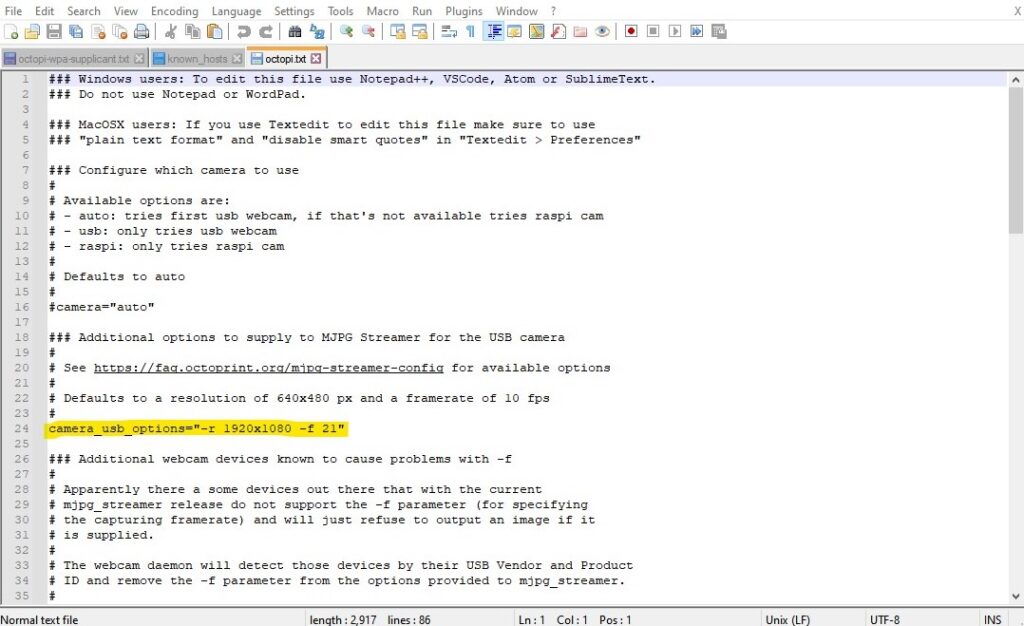
Near the top of the file there’s a line that reads:
# camera_usb_options=”-r 4096×2160 -f 15″
I uncommented this by removing the # at the start, then the bit in inverted commas was updated with the settings for my webcam taken from the OctoPrint camera guide linked above. My webcam model isn’t listed as it’s a generic unbranded one, but I knew that the resolution is 1920×1080, so I used:
camera_usb_options=”-r 1920×1080 -f 21″
as that matches the camera’s resolution (although it is listed on the OctoPrint site as an AliExpress generic, rather than Amazon). The edit is highlighted below:
Further down the file the two lines highlighted below were modified to read as shown:
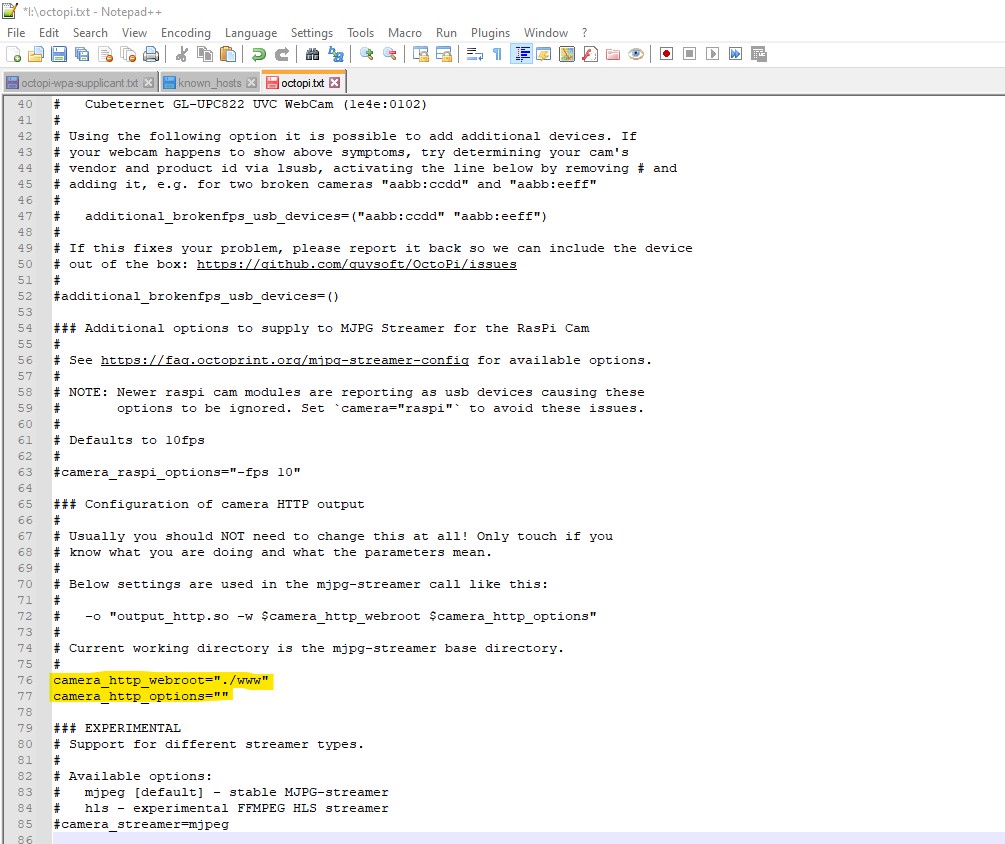
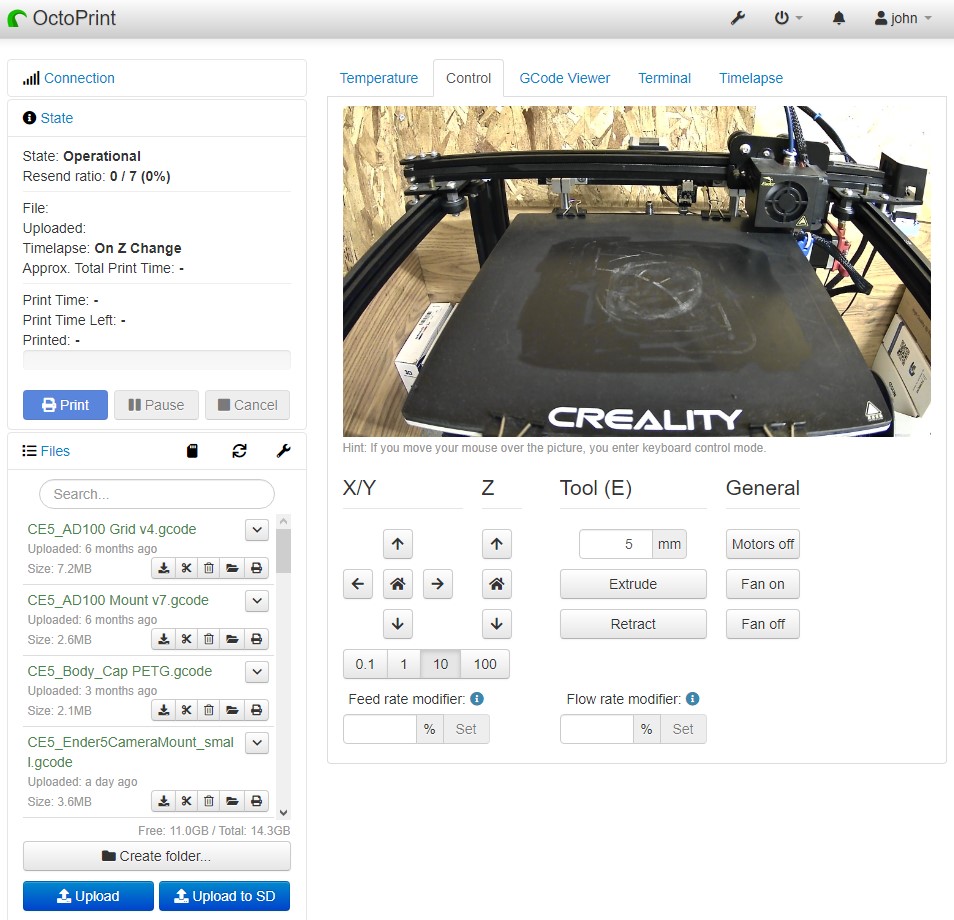
With the edits made the file was saved back to the micro-SD card and the card re-inserted in the RPi. I then plugged in the webcam and powered up the RPi. The OctoPrint UI’s “Control” tab immediately showed an image from the webcam.
Mounting the Webcam
When I first tried out the webcam, in order to get it tested quickly I mounted it on the front top rail of the printer. For the Ender 5 this seemed like a good place for it as the printer lowers the bed after each layer, so the action is always happening at the top.
The images produced looked promising at first glance but taking a closer look the print head was out of focus. The good news was that the back rail of the printer did look sharp. Not exactly what I was hoping for, but it showed that the webcam was capable of taking sharp images.
Mounted on the printer’s top rail the camera is pretty close to the action, so the print was probably closer than the minimum focus disance of the lens. Unfortunately I have no datasheet for the webcam to check this. To test the theory I dug out a tripod and stuck the webcam on that. I positioned it so the camera was about 25cm from the middle of the build plate. While this setup wasn’t as compact, the results were much better:
Having a tripod sitting in front of the printer was never going to be a permanent solution, so I had to find better a way of mounting the webcam. My current solution is a webcam mount for the Ender 5 that I downloaded from Thingiverse. This was easy to print and get set up and works very well.
Making Timelapses
So that was basically target number one achieved – live visual monitoring of the printer’s build plate. With that ticked off it seemed like a good idea to try recording a timelapse of a print.
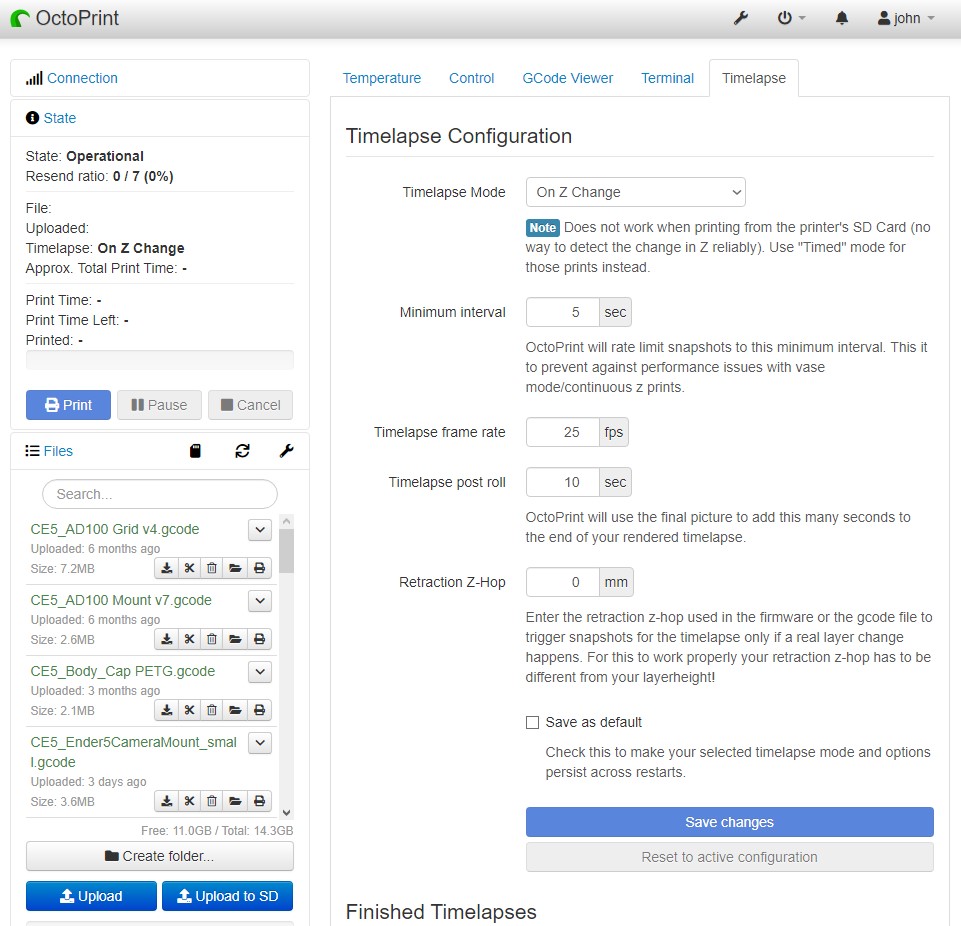
Getting OctoPrint set up to do a basic timelapse is very simple, using options in the last tab on the OctoPrint UI. I just had to select “on Z change” on the Timelapse Mode dropdown, add a few seconds in the Timelapse post roll box, save the changes and I was ready to record.
The timelapses OctoPrint produces straight out of the box are pretty good. This is a very short timelapse taken printing the mount part of my Godox AD100 grid :
OctoPrint can’t create timelapses where the print head is always out of the way and the print just appears to grow out of the build plate. To do that you need an OctoPrint plugin called Octolapse. I’ve experimented with Octolapse but never yet managed to tune out the stringing it produces on my prints. So for now I’ve reverted to using the regular OctoPrint timelapses.
A Note on Raspberry Pi Models
I found two slightly annoying issues when I was running the webcam with OctoPi on my Pi 3B. The live update was very slow and laggy and rendering the timelapse at the end of a print was a slow process, especially for bigger prints. Since I had a spare Pi 4 I decided to try using this to throw some extra computing power at the problem to see if that made a difference.
It did, massively. The live webcam view updates way more frequently and is a lot less jerky. Timelapse rendering is also much quicker. With the Pi 4 OctoPrint itself seems much more responsive generally. As a result the Pi 4 has stayed and I’m now looking for a less arduous project for the Pi 3B.