While I’m waiting for parts for the stepper motor-based design I’m working on, I thought I’d take a quick trip back to basics. My first DIY photography build was a beauty dish made out of a plastic bowl and a drinks coaster. It was a pretty simple device, but at the time I was amazed at how well it worked. These days I have a bunch of Bowens- and Elinchrom-fit light modifiers, including a 40cm beauty dish. So I don’t need a hacked DIY beauty dish. Or do I?
My Godox AD100 Pro strobe is compact and lightweight, but far too small to support most of my studio light modifiers. So how about a lightweight beauty dish that’s a bit more portable than my studio version? Enter the next generation DIY bowl beauty dish.
When I was meandering about on the internet I ran across a collapsible dog bowl. This got me thinking – could you use one of these as a the basis of a light modifier? Only one way to find out – I bought a pair of them from Amazon, a blue one for the dog and a black one for modifying.
Reflector
With a 3D printer in the house, the drinks coasters are safe this time. This also gives the advantage that the reflector can be made a better shape for the job – flat on the outside and slightly convex on the inside. This should mean that more of the reflected light disperses outwards rather than straight back at the flash head.
The reflector was printed with white PLA, so some light does transmit through it. This probably gives a more even light output across the dish.
Mount
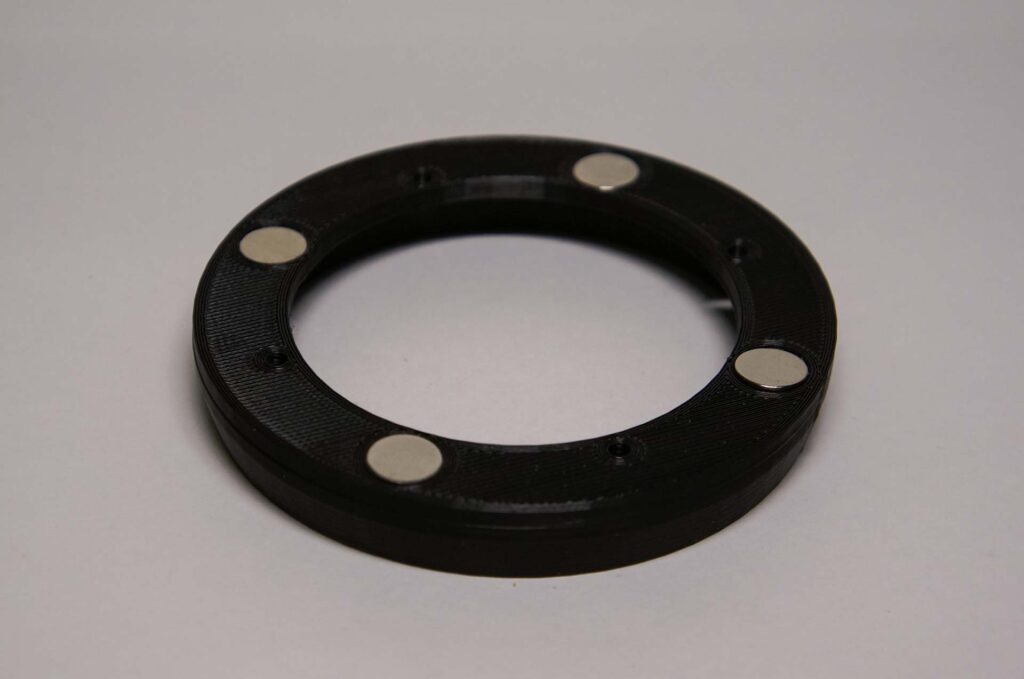
Before cutting a hole in the bottom of the bowl I designed a mount to fit it on the AD100. Back in the day this would have involved a search for suitable materials and a lot of cutting, metal bending, pop-rivetting and screwing things together. These days it’s a lot easier – it’s just 3D printed. It’s designed along similar principles to the AD100 grid I made last year, but with bigger magnets.
The mount is in two parts. The first bolts on to the reflector and fits inside the bowl. The second bolts onto the inside part through the base of the bowl. This latter part has recesses for four 10mm x 2mm circular magnets for clipping the ensemble to the front of the Godox unit.
The back part of the mount was printed using the last of my Technology Outlet deep black PLA. As usual the bed temperature was set to 50°C, nozzle to 210°C and layer thickness to 0.2mm. The inner part of the mount was printed with white PLA using the same printer settings.
Bowl
Not too much to do to the actual bowl, although obviously it did need a round hole cut in the bottom. The inner mount’s lip has a diameter of 67mm, so that’s the size of the hole. It was cut with an Olfa compass cutter which coped fine with the approx 2.5mm thick bottom of the bowl. Using the front mount part as a template four 2.5mm holes were also cut for the mounting bolts. These bolt holes are very close to the edge of the large hole, but that’s not a problem as there is a wide band of plastic in contact with the bowl to keep everything secure.
The other modification to the bowl was to the inside surface. While black is a great colour for the outside of a beauty dish, it’s not exactlty a great light reflector, so the inside needed to be painted. Since the bowl collapses I used flexible silver textile paint for this. It took a few coats, but eventually I got a reasonably even, reflective surface. Time will tell how it holds up after multiple fold-unfold cycles.
Putting it Together
The front part of the mount was bolted to the reflector using four 8mm M2.5 countersunk bolts. The front assembly and magnetic mount are shown below:

To complete the dish, I bolted the magnetic mount to the front assembly through the holes in the bowl using 10mm M2.5 bolts. The finished article looks like this:

… and when it’s folded:

Finally, a front view with the AD100 set to manual on 1/256 power:
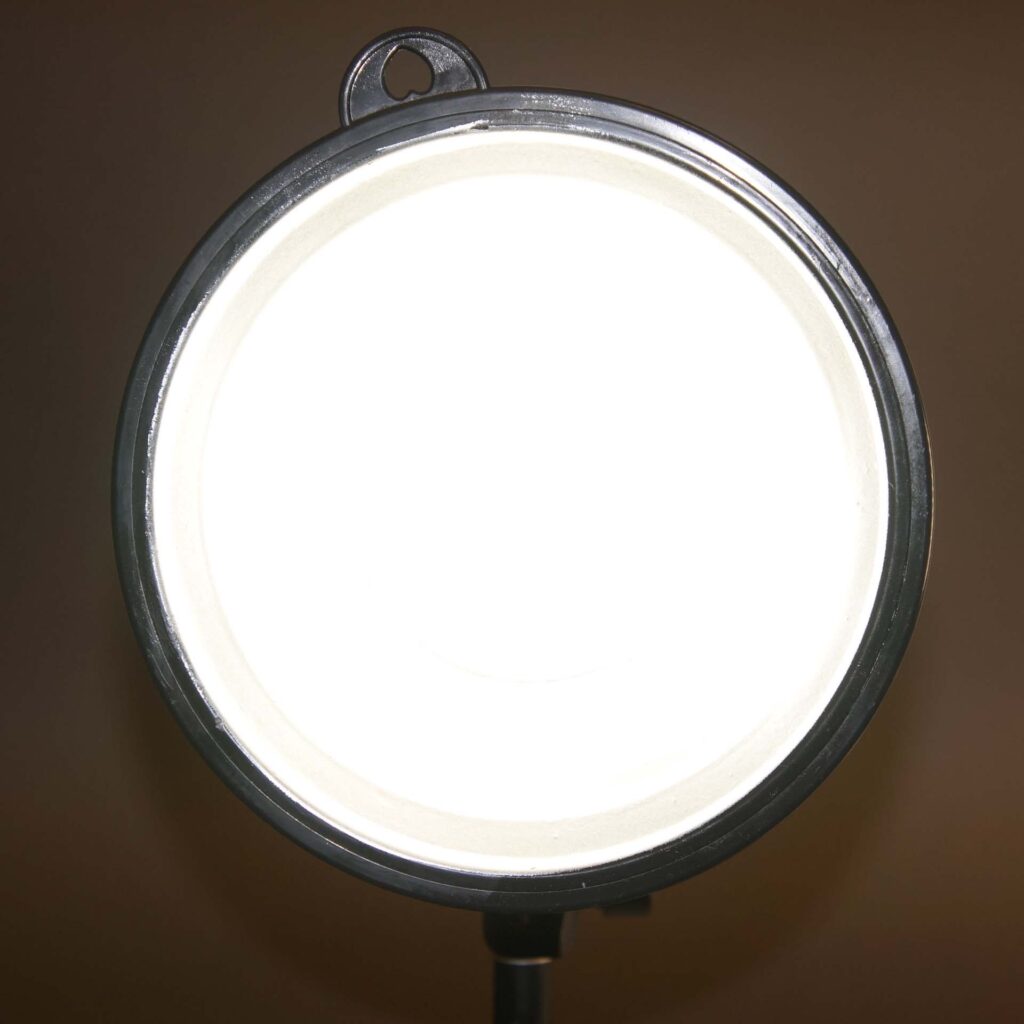
As you can see the light is reasonably even apart from a bit of a reduction in the outermost ring. This is due to the stepped shape of the bowl – necessary to allow it to be folded but not so good for bouncing light. To remove this issue the mount and reflector could, of course, be used on a non-collapsible bowl. Doing this it would make sense to lengthen the legs on the reflector to give better light dispersion. Apart from that it should work fine as long as the bowl is reasonably light (weight).
With four embedded magnets the adhesion to the front of the Godox unit is not bad. I did subsequently increase the number of magnets to six to make it more secure. The attached zip file contains stl files for the three parts – the magnetic mount is the six magnet version.
Beyond the AD100
The good news for Godox users is that the “accessory port” (front surface) on the Godox V1 round headed hotshoe flash is the same as on the AD100 Pro. This means the dish should just click onto the front of of a V1. Even better, attaching Godox’s H200R round head to the front of an AD200 should give the same compatibility. Note: I don’t have a V1 or AD200/H200R, so haven’t been able to try these yet.