The motivation for this project came from a portrait session in the living room that hit all too familiar space problems. I needed a backdrop and rim lighting. By the time I had my background set up using a pair of light stands and the two rim lights on another pair of light stands floor space was starting to get a bit tight. And that was before I’d added the key light. In an ideal world I’d be working in a room with no furniture and fittings, but for most of us chucking out the living room furniture in pursuit of our art isn’t an option.
As an alternative, wouldn’t it be good to have a background system that takes up a lot less floor space? And that doesn’t involve attaching anything to brackets on the walls or ceiling, as I’m never likely to get away with that either!
The Stick in a Pot
The means came shortly afterwards when I spent an “enjoyable” day mixing concrete for a shed base. Concrete’s amazing stuff, and since I had a fair amount of ballast and cement left over I had a think about other ways to use it up. One idea that sprang to mind was a background support based on the “stick in a pot” (also known as “stick in a can”) supports I saw online somewhere a few years ago.
As well as having a much smaller footprint than a regular light/background stand, concrete is heavy stuff so there shouldn’t be any need to add sandbags to keep it all stable. The only problem with the regular “stick in a pot” is that the stick is, funnily enough, just a stick (or a length of 2” by 1”). As a result it has to be as tall as the greatest height needed for the background. This makes it a bit unwieldy for moving around and storage. If only the sticks could be extendible, so they’re short for storage and transportation, and long when they’re actually at work holding up the background …
The Extendable Stick
On the lookout for the extendable “stick” I ran across some Harris brand decorators’ poles at the local Screwfix (trade catalog store that’s run by the same company as B&Q, the UK equivalent of Home Depot). These poles come in various lengths, but with average ceiling heights in modern houses being about 2.5 metres (8 feet), the ones that extend to 3m are plenty long enough to use anywhere I’m likely to be setting up my backgrounds. After removing the hand grips from these the outside diameter was about 32mm (1¼ inches).
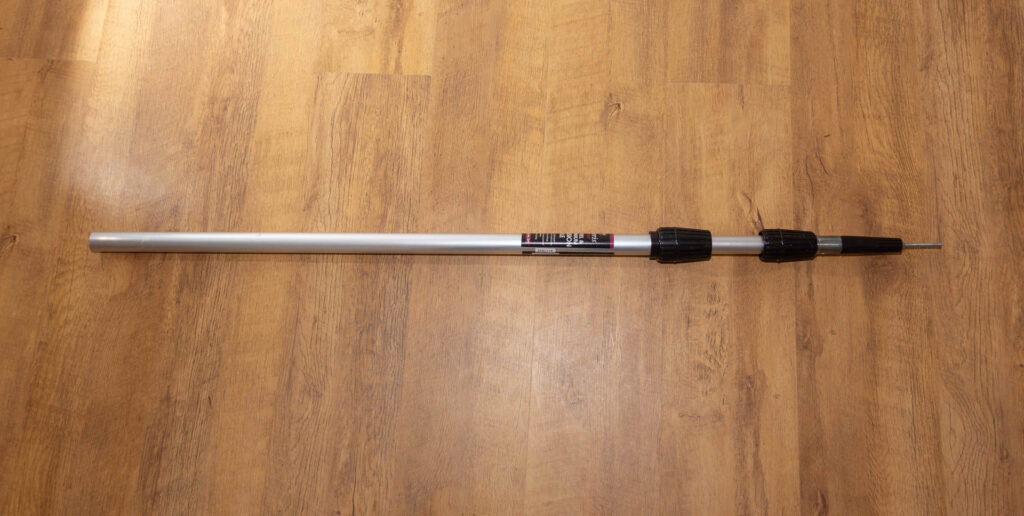
In their unextended state the poles are about a metre long, so for convenience it seemed sensible not to have them permanently embedded in the pots. Therefore I needed a tube with an internal diameter of just over 32mm to cast into the concrete so the poles could be slid in when the stands are in use and removed when they’re not.
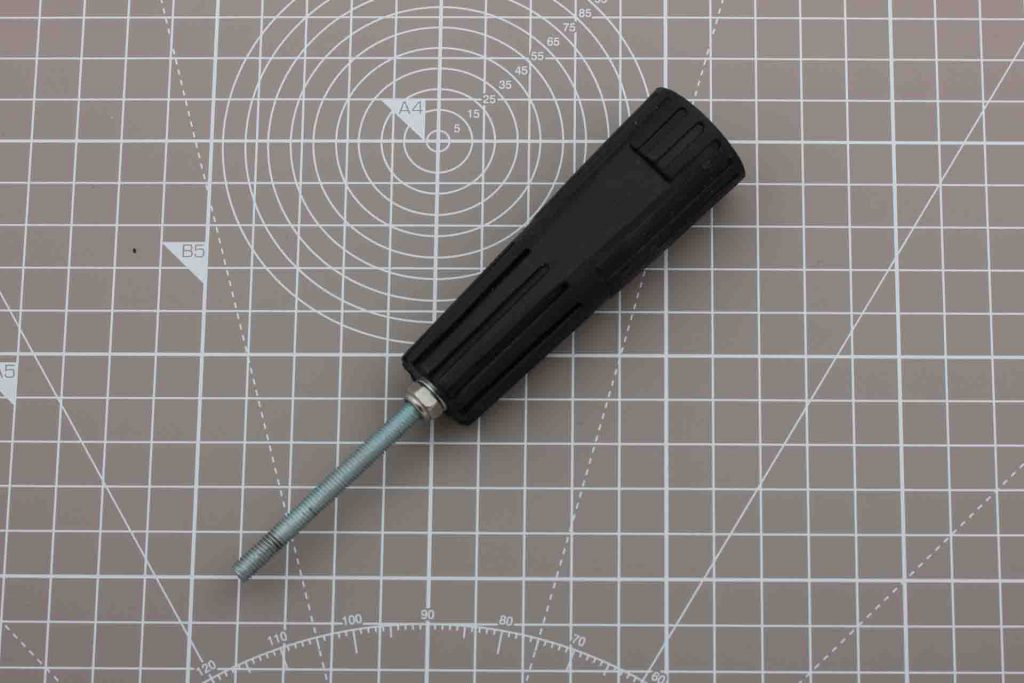
That proved not to be quite as simple as it sounded, as I couldn’t find any pipe/tube with an internal diameter that was suitable. However, eventually I came up with some plastic waste pipe couplers that could be fashioned into a solution. One end of the coupler is for push-fit 32mm pipe (which has an outside diameter of 35mm) but the other end is a good fit on the painters pole, although I did open it up slightly with a Dremel sanding band so it wasn’t too tight. The final kit of bits for the pot insert is shown here:

Taking a 20cm length of 40mm plastic waste pipe (note that the length will depend on the height of your paint pot) and slitting along it with a saw disk on a Dremel tool, the couplers were inserted at the ends and glued in place using two-part epoxy. The gap along the side was then covered over with gaffer tape and sealed with silicone rubber. The coupler at the bottom was fitted with a plug to stop wet concrete from seeping in, and the one at the top was just left open, although it’s worth temporarily fitting a plug when the concrete is being poured, just in case … This is what the tube looked like before and after being sealed:


To fix the pipe in place and ensure it was vertical I used a pair of plastic pipe clips attached to the pot with self-tapping screws.
Handle
Another thing that seemed like a good idea was to attach a metal handle to the can for carrying the base around. A 5-litre can filled with concrete is pretty heavy so you certainly wouldn’t use the existing plastic handles to lift the weight. They were removed, and new ones were bent up from lengths of alloy bar. These were attached with bolts through the wall of the paint pot.
Because the bolts have to be near the top of the pot, most of the weight they’re carrying is below them. Since it isn’t reinforced, the concrete above the bolts could potentially crack and allow the bolts to tear out. My solution to this was to add a second length of bent alloy bar that’s embedded deep into the concrete and is attached to the two handle bolts inside the pot. I also riveted an alloy plate to the lower part of the bar to really ensure the weight of the concrete was spread well. Prior to pouring the concrete the assembled contraption looked like this:

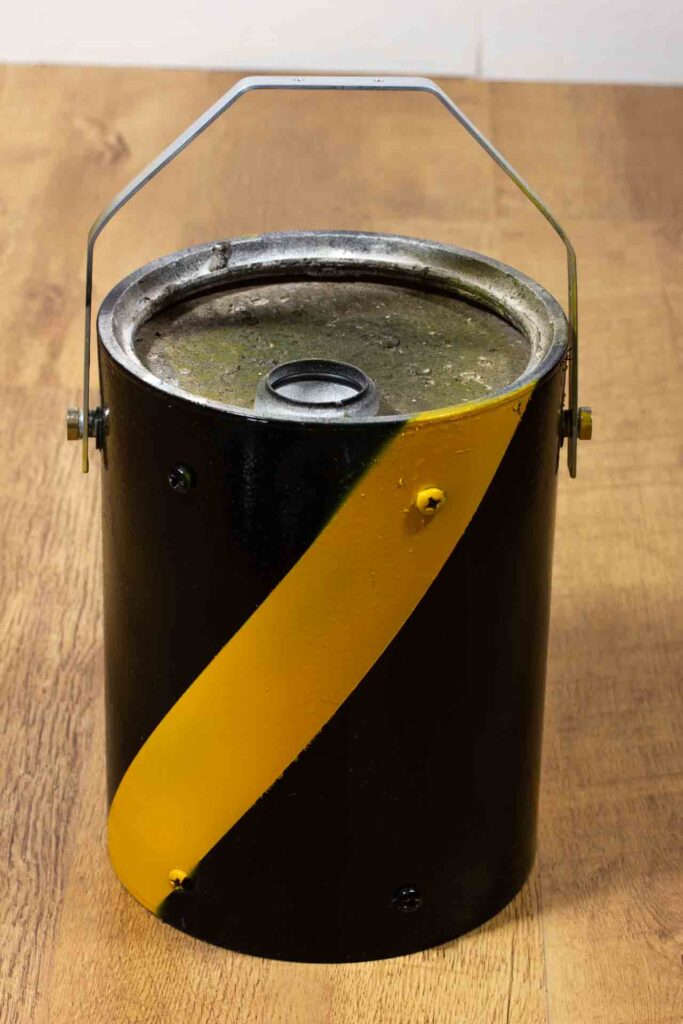
Once the concrete has been poured and you’ve waited for a suitable length of time for it to set – I gave it four days – the base is effectively ready to use. This means it’s probably time to repeat the process so that you’ve got a pair of bases, one for each end of the background. As a finishing touch I spray painted the pots black. Because they are very heavy and likely to be unforgiving if you kick them or walk into them I added a couple of diagonal yellow stripes to improve visibility. Finally I applied a couple of coats of silk finish water-based clear varnish, as from previous experience the spray paint isn’t the most durable and chips/scratches quite easily. I probably should have masked the top of the concrete when I sprayed all that paint to avoid the mossy-looking finish, but that can always be spruced up later.
Poles
Moving on to the poles: first the hand grips at the end were removed – these are just rubber and can be cut off easily. Next I needed some sort of fixing for the background roll’s support pole to attach to. The Harris poles can be used as a push fit or screw fit into a paint roller and have a coarse thread at the top end with a removable plastic screw-on cap for push fit rollers. The cap has a 5mm hole in the top, so the simplest way to attach the crossbar is to put a long bolt through the hole from the inside, with a washer and locking nut on the outside. The result looks like this:
With holes drilled through each end of the background’s crossbar it just slips over the bolts. If you’re worried about stability you can always add a wing-nut after attaching the crossbar to keep it all in place. In my experience you really don’t need this. The completed background support setup looks like this:

The following picture shows the stands set up with a (slightly transparent) eight foot background.

A note on the Concrete Mix:
Ratios for mixing concrete vary quite widely depending on what it’s being used for. I’m no expert, but for this non-structural application I used a 1:2:4 ratio – that’s one part cement, 2 parts sand, 4 parts gravel. If you’re using pre-mixed ballast (i.e. sand/gravel mix) that’s equivalent to 1 part cement to 6 parts ballast.
I use a large bucket for mixing: add the cement and ballast and mix them thoroughly while they’re still dry, then add water gradually mixing all the time until it’s thoroughly combined and has a workable consistency. There’s lots of advice online about making a perfect concrete mix and what that “workable consistency” should be, but bear in mind that for this application ensuring maximum strength isn’t going to be that important – its only holding up a couple of poles and a background roll.
One final warning: the bases are very heavy and unforgiving, so be careful handling them and when they’re being carried around never hold them above anything that’s likely to be seriously damaged by 11 kg of concrete falling on it; such as your foot, your kids, your pet or your camera gear, to name but a few!
One thought on “Make a Concrete Background Support”