For anyone who doesn’t have wireless built in to their camera, the notion of getting wireless control and viewing has always been either impossible, or, at a price, the domain of third party providers. There are a growing number of third party wireless tethering devices on the market: the CamRanger has been around for a while, but with the current model (the CamRanger 2) coming in at over £400, the chances of the budget-concious getting their hands on one are slim. One of the new contenders is the CamFi Pro Plus (sounds like something you’d take to keep you awake), but that costs about £300 so still too expensive for the budget-constrained user.
So how do you get wireless camera control and tethering without spending an arm and a leg? You make it yourself, of course. I’ve been following the DIY Photography website for years, and in amongst the reviews of new kit, speculation about upcoming cameras and other general photography related posts, there have been some great artcicles about how to build photography equipment. One that caught my eye was one about using a cheap battery powered portable router plugged in to your DSLR’s USB port to give wireless control. The project used a TP-Link MR3040 wireless 3G router (which looks uncannily like the original CamRanger) loaded with open source wireless router firmware, and a third party phone/tablet app (qDSLRDashboard) with associated server software.
The trouble with this solution is that in the UK at least TP-Link MR3040 routers are very hard to find, and when you can find one it’s generally priced about the same as a CamRanger. So time for a bit of lateral thinking …
Portable Routers
There are plenty of portable wireless routers about, but they don’t generally have batteries built in. What some of them do have, though, is input power via a USB connector. This means that with an external USB power bank it should be possible to build a two-piece solution to prove the concept. So this becomes a project build in two parts: in this first part I’ll get the control and transfer functionality working using an alternative wireless router, powered by an external USB battery pack. In the second part I’ll be aiming to get it all packaged up together in a hotshoe mountable unit.
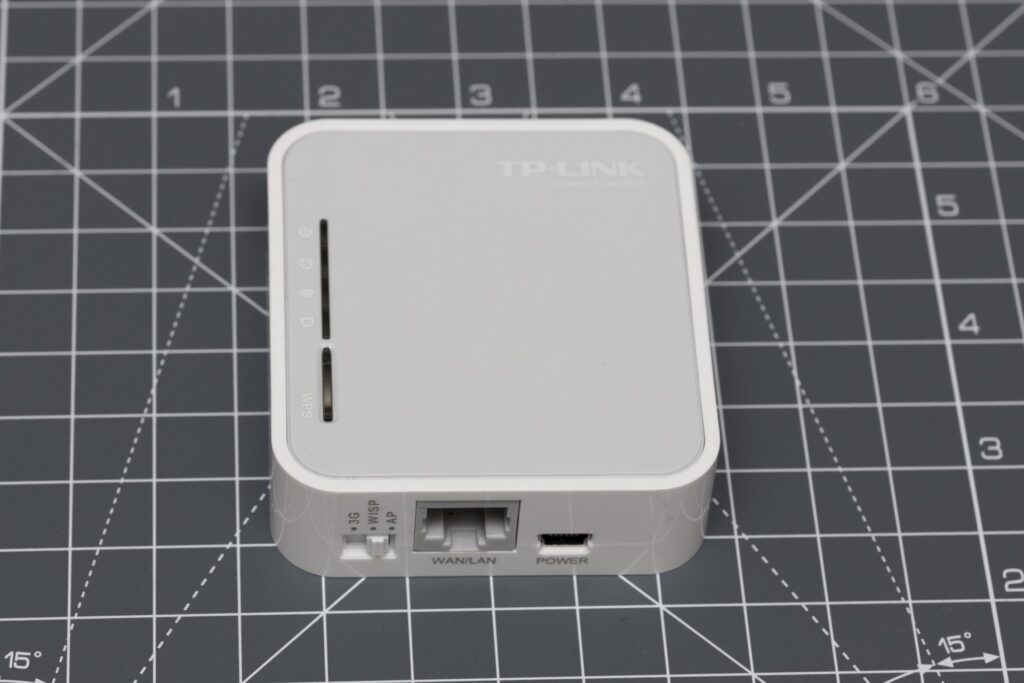
The first step is choosing the portable router. This needs to be one that’s supported by OpenWRT (open source router firmware) of which there are tons. However, the other important selection critereon is that it has a version of qDSLRDashboard’s ddserver available. This limits the choice significantly to the extent that other than the hard to find MR3040, at the time of writing I think there are only two. The good news is that one of these is the TP-Link MR3020 unit – which is small, cheap, easy to get hold of and can be powered over USB. In fact according to the OpenWRT page for the MR3020 (https://openwrt.org/toh/tp-link/tl-mr3020) it can run from as little as 3.3 Volts, which could be useful when I get around to the second part of this project.
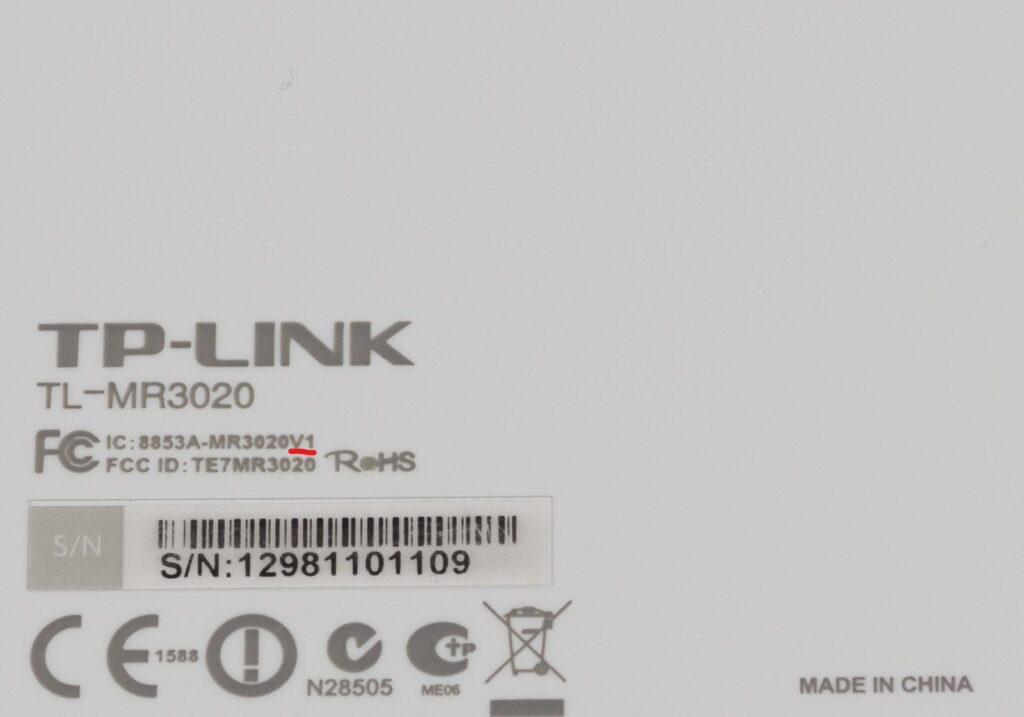
The MR3020 router comes in two flavours – version 1 and version 3. The following instructions are for the V1 router, as this was the one I managed to buy. I haven’t done a V3 myself, but the procedure’s a bit different and is described in this thread on the qDSLRDashboard support forum. You can tell which version you’ve got by looking at the back (the important bit is underlined in red):
Router Firmware
If you’ve got a V1 type of MR3020 router there are two ways of turning it into the access point for your camera: the hard way or the easy way. Naturally I chose the hard way as I like making life difficult for myself. So here’s what to do …
The hard way:
Download the MR3020 V1 firmware from the OpenWRT site. Note that the latest versions of OpenWRT don’t work with the V1 routers, so it’s important to download the right version, as flashing the router with the wrong one has the potential to brick it!
Step 1
OK, now the fun starts. Power up the router and connect it to your computer using a network cable. In a web browser type 192.168.0.254 into the address field – when prompted for user name and password enter admin and admin (very secure!) . This will take you to the router’s management page.
From the menu on the left hand side of the browser window go to System Tools >> Firmware Upgrade, then select the file downloaded from OpenWRT and click the “Upgrade” button. The router’s firmware will be upgraded and the router will restart. Now connect to it at 192.168.1.1 to get to the OpenWRT login page. There is no password for the roor user, but it’s worth setting one at this stage as it’ll be maintained by the system through the next upgrade.
Step 2
Now you need to get ddserver installed, which requires another download and flash: download the upgrade file (the one named “…3020 SYSUPGRADE”) from the DSLR Dashboard site (https://dslrdashboard.info/downloads/), then go to the System >> Backup/Flash Firmware from the OpenWRT menu bar. In the “Flash new firmware image” section select the sysupgrade file you just downloaded from qDSLRDashboard, check the “keep settings” box and click the “Flash Image” button. After a couple of minutes the router will restart again. There are a couple of settings that need to be changed, but first I’ll describe the single step version of the upgrade.
The easy way:
Download the “… MR3020 FACTORY” file from the qDSLRDashboard site, power up the router and connect to your computer using a network cable. As with the two step method above, in a web browser type 192.168.0.254 into the address field. When prompted for user name and password enter admin and admin. This takes you to the router’s TP-Link management page.
From the menu on the left of the browser window go to System Tools >> Firmware Upgrade, then select the file downloaded from qDSLRDashboard and click the “Upgrade” button. The router’s firmware will be flashed and the router will restart. Connect to it at 192.168.1.1 this time to get to the router’s OpenWRT login page. There is no password set for the root user so you can log in without a password, but you should set a root password at this point.
So either long or short way that’s the router’s firmware flashed to OpenWRT with ddserver and you should be logged in as the root user.
Router Setup
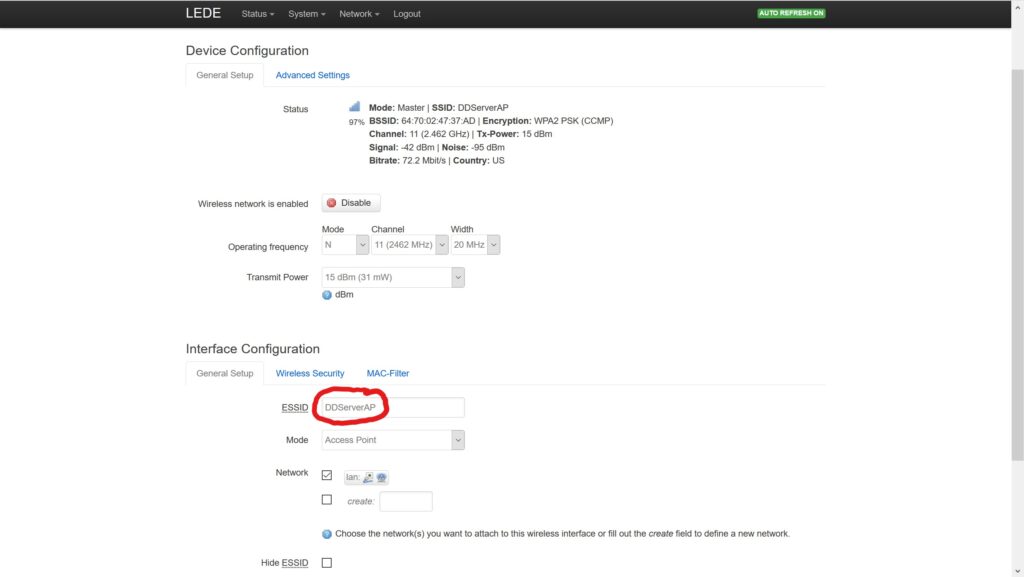
Now go to Network>>Wifi from the OpenWRT menu bar and select the “Edit” button beside the wifi network. Scroll down to “Interface Configuration” and on the “General Setup” tab type the name you want the wireless network to appear as in the “ESSID” box, ensure “Access Point” is selected in the “Mode” dropdown and make sure the network is turned on.
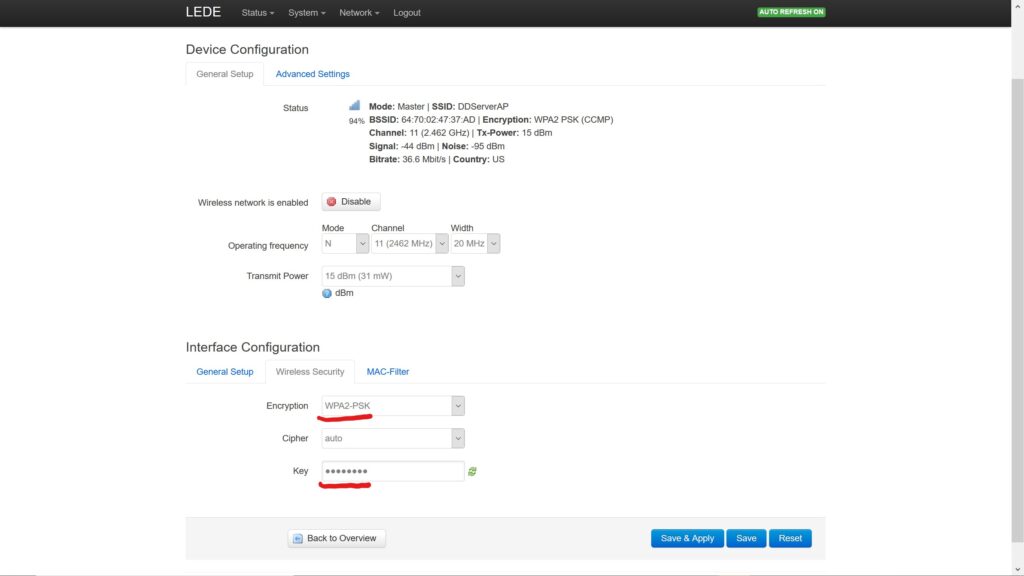
Finally go to the “Wireless Security” tab and set encryption for your new wireless network – I used WPA2-PSK. Set your key (password) then hit “Save & Apply”. Now disconnect from the router as it’s all set up.
Control Software
To control the camera you need a copy of the qDSLRDashboard software. I’m using an Android tablet as my controller so I purchased a copy on Google Play. You can also download the software to run on Windows, Linux, OSX or Raspberry Pi from the qDSLRDashboard site (same link as above).
Now after all that effort it’s time to actually use the wireless tethering setup. Ensure the router’s switch is set to “AP” (access point), power up the router using the USB power bank and plug the camera into the router’s “3G USB” socket.
Before running the qDSLRDashboard software the tablet/computer/phone needs to be connected to the router’s wireless network. When it’s connected run qDSLRDashboard and select the second button from the left in the menu bar: this will connect to the camera and take control. Details of how to drive qDSLRDashboard can be found on their website.
In locked-down UK the chances to take this setup out and about and experiment with it are very limited, but here’s an image of the qDSLRDashboard controller taken with the camera it was controlling.
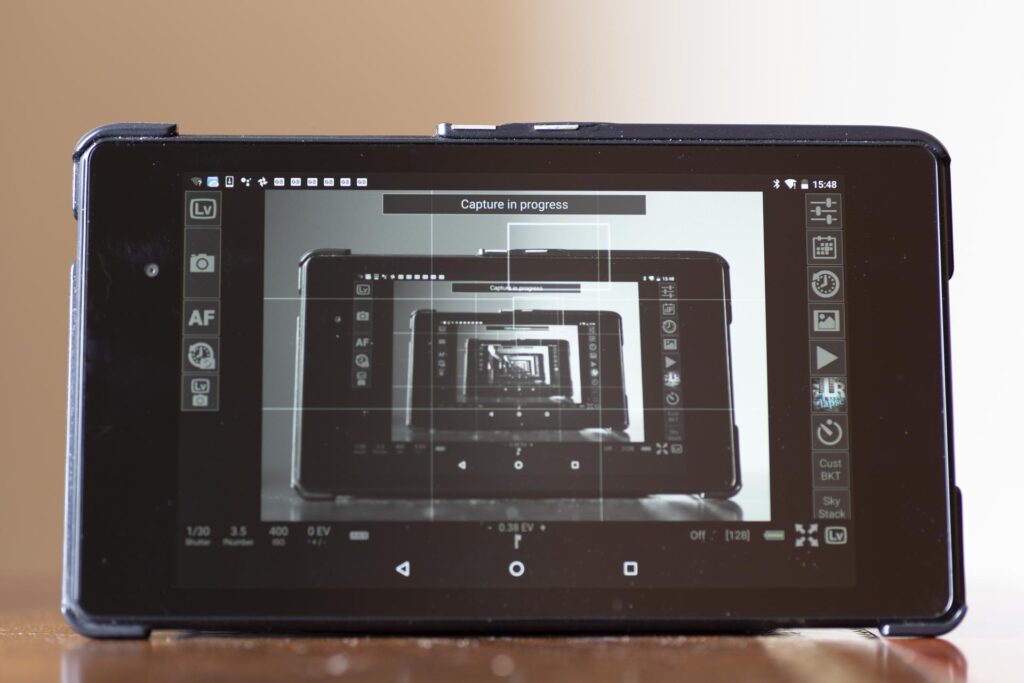
Note: no wires, and you can see my hand retreating after pressing the shutter button on about the fourth screen in.
One thought on “DIY Wireless Tethering for DSLRs”